
MilwaukeePlunge Cut Base Installation Instructions
Important Safety Instructions
Attach To Tool
Step 1: Put oscillating tool on a flat surface with the blade attachment facing up toward the sky
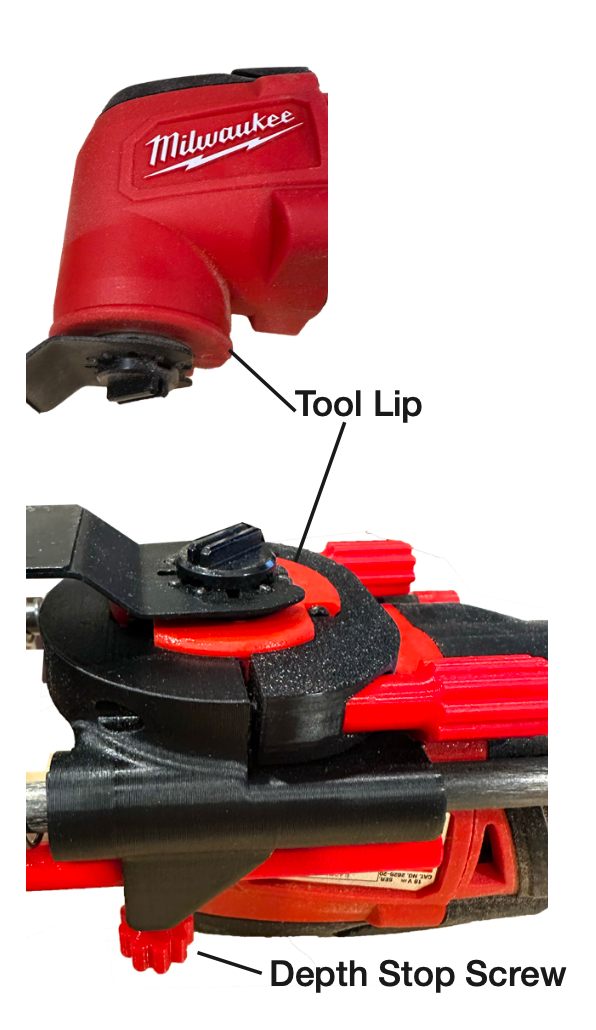
Step 2: Loosen thumbscrews and press the mount onto tool with the depth stop opposite of the blade. When installing make sure the lip on the tool is proud of the tool mount as shown.
When pushing the mount onto the tool you might hear a small click - this is ok.
Step 3: Tighten thumb screws evenly until there is a secure connection with the tool.
When removing the attachment, you do not need to fully remove the thumb screws.
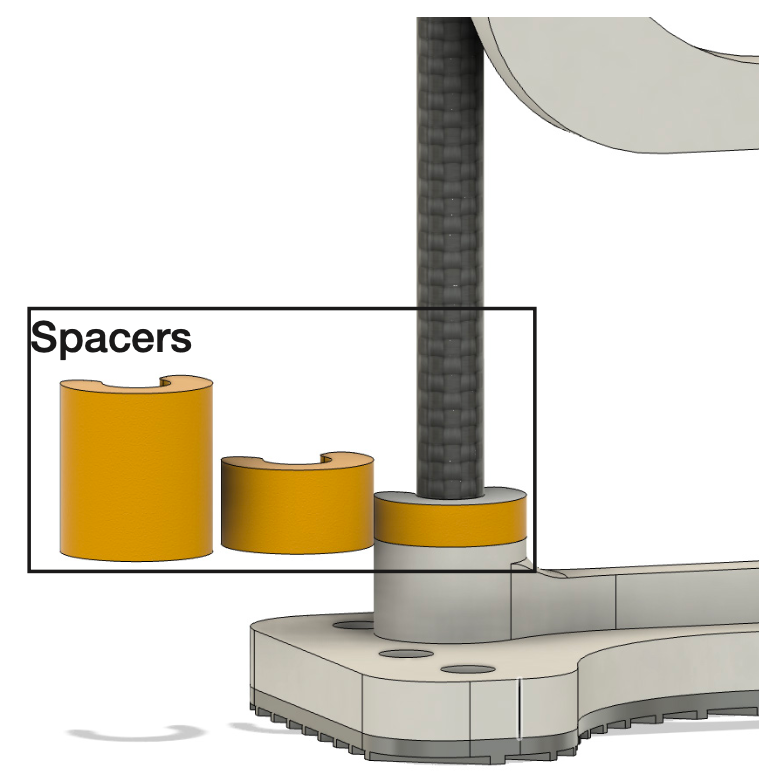
Spacers
There are 3 spacers (5mm 10mm 15mm) included that can be added or removed to offset longer blades.
Bottom platform can be flipped around if desired. Extra mounting points are for attachments like dust collection - coming soon!
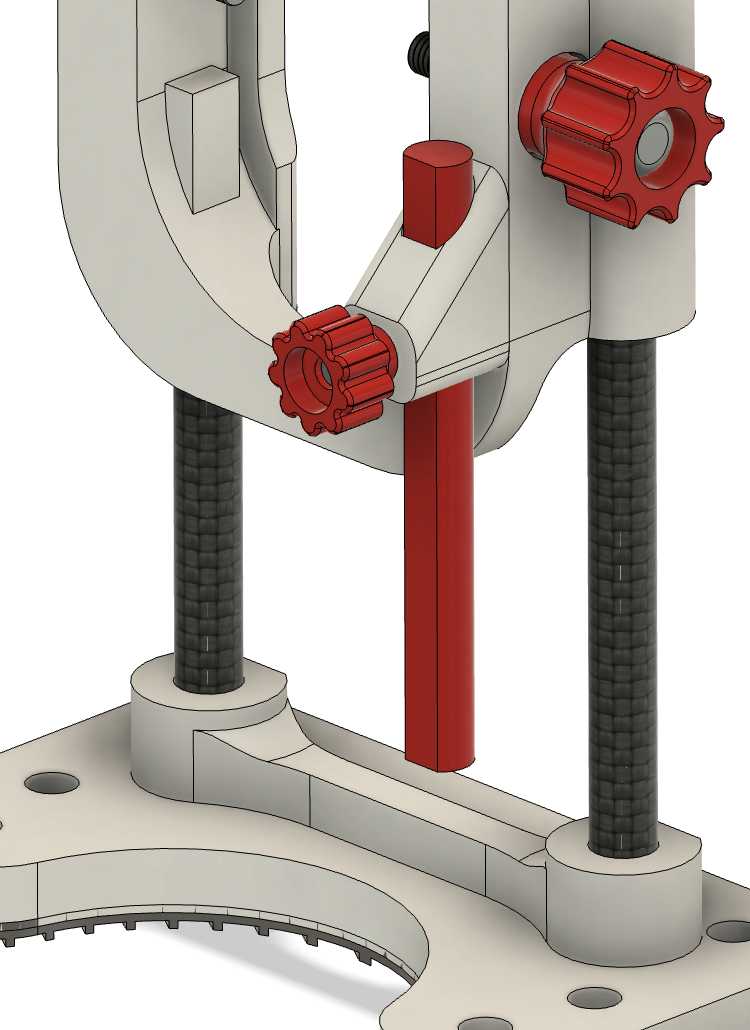
Using the depth stop
Due to the high oscillating vibrations, we have included a wave washer to offset the screw from loosening. Ensure that you tighten the depth stop as much as possible to prevent loosening while using the tool.