
Makita Plunge Cut Base Instructions
Important Safety Instructions
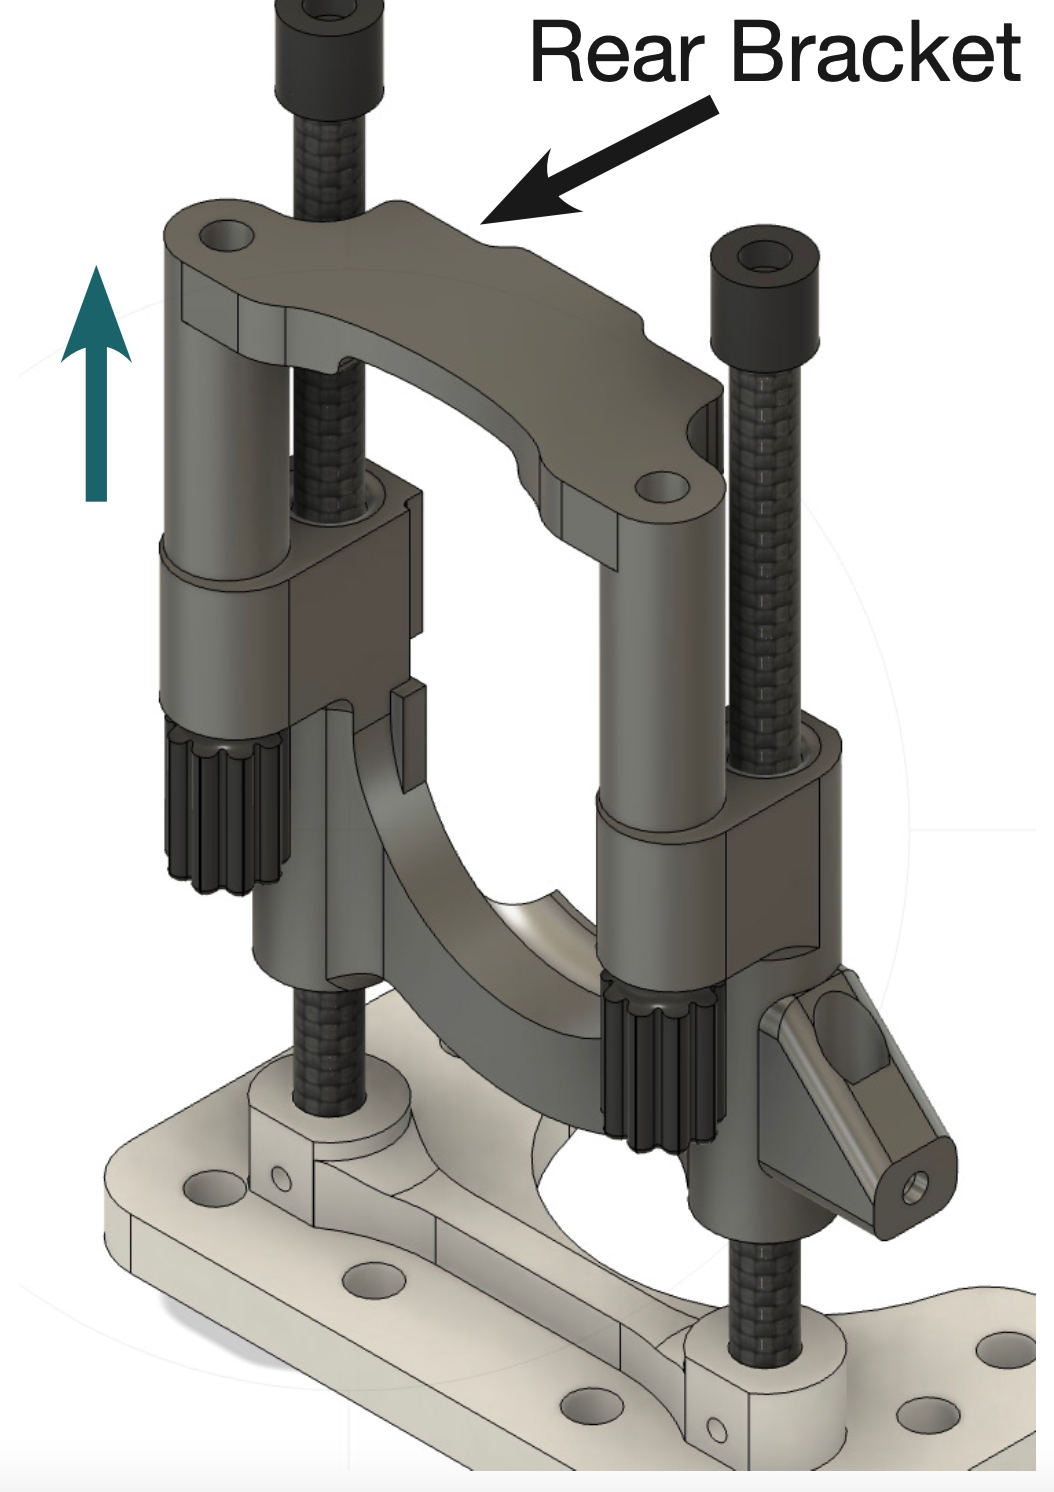
Attach To Tool
Step 1: Loosen the rear bracket by unscrewing the two knobs 1/2” (12mm) to allow the mount to slide onto the tool
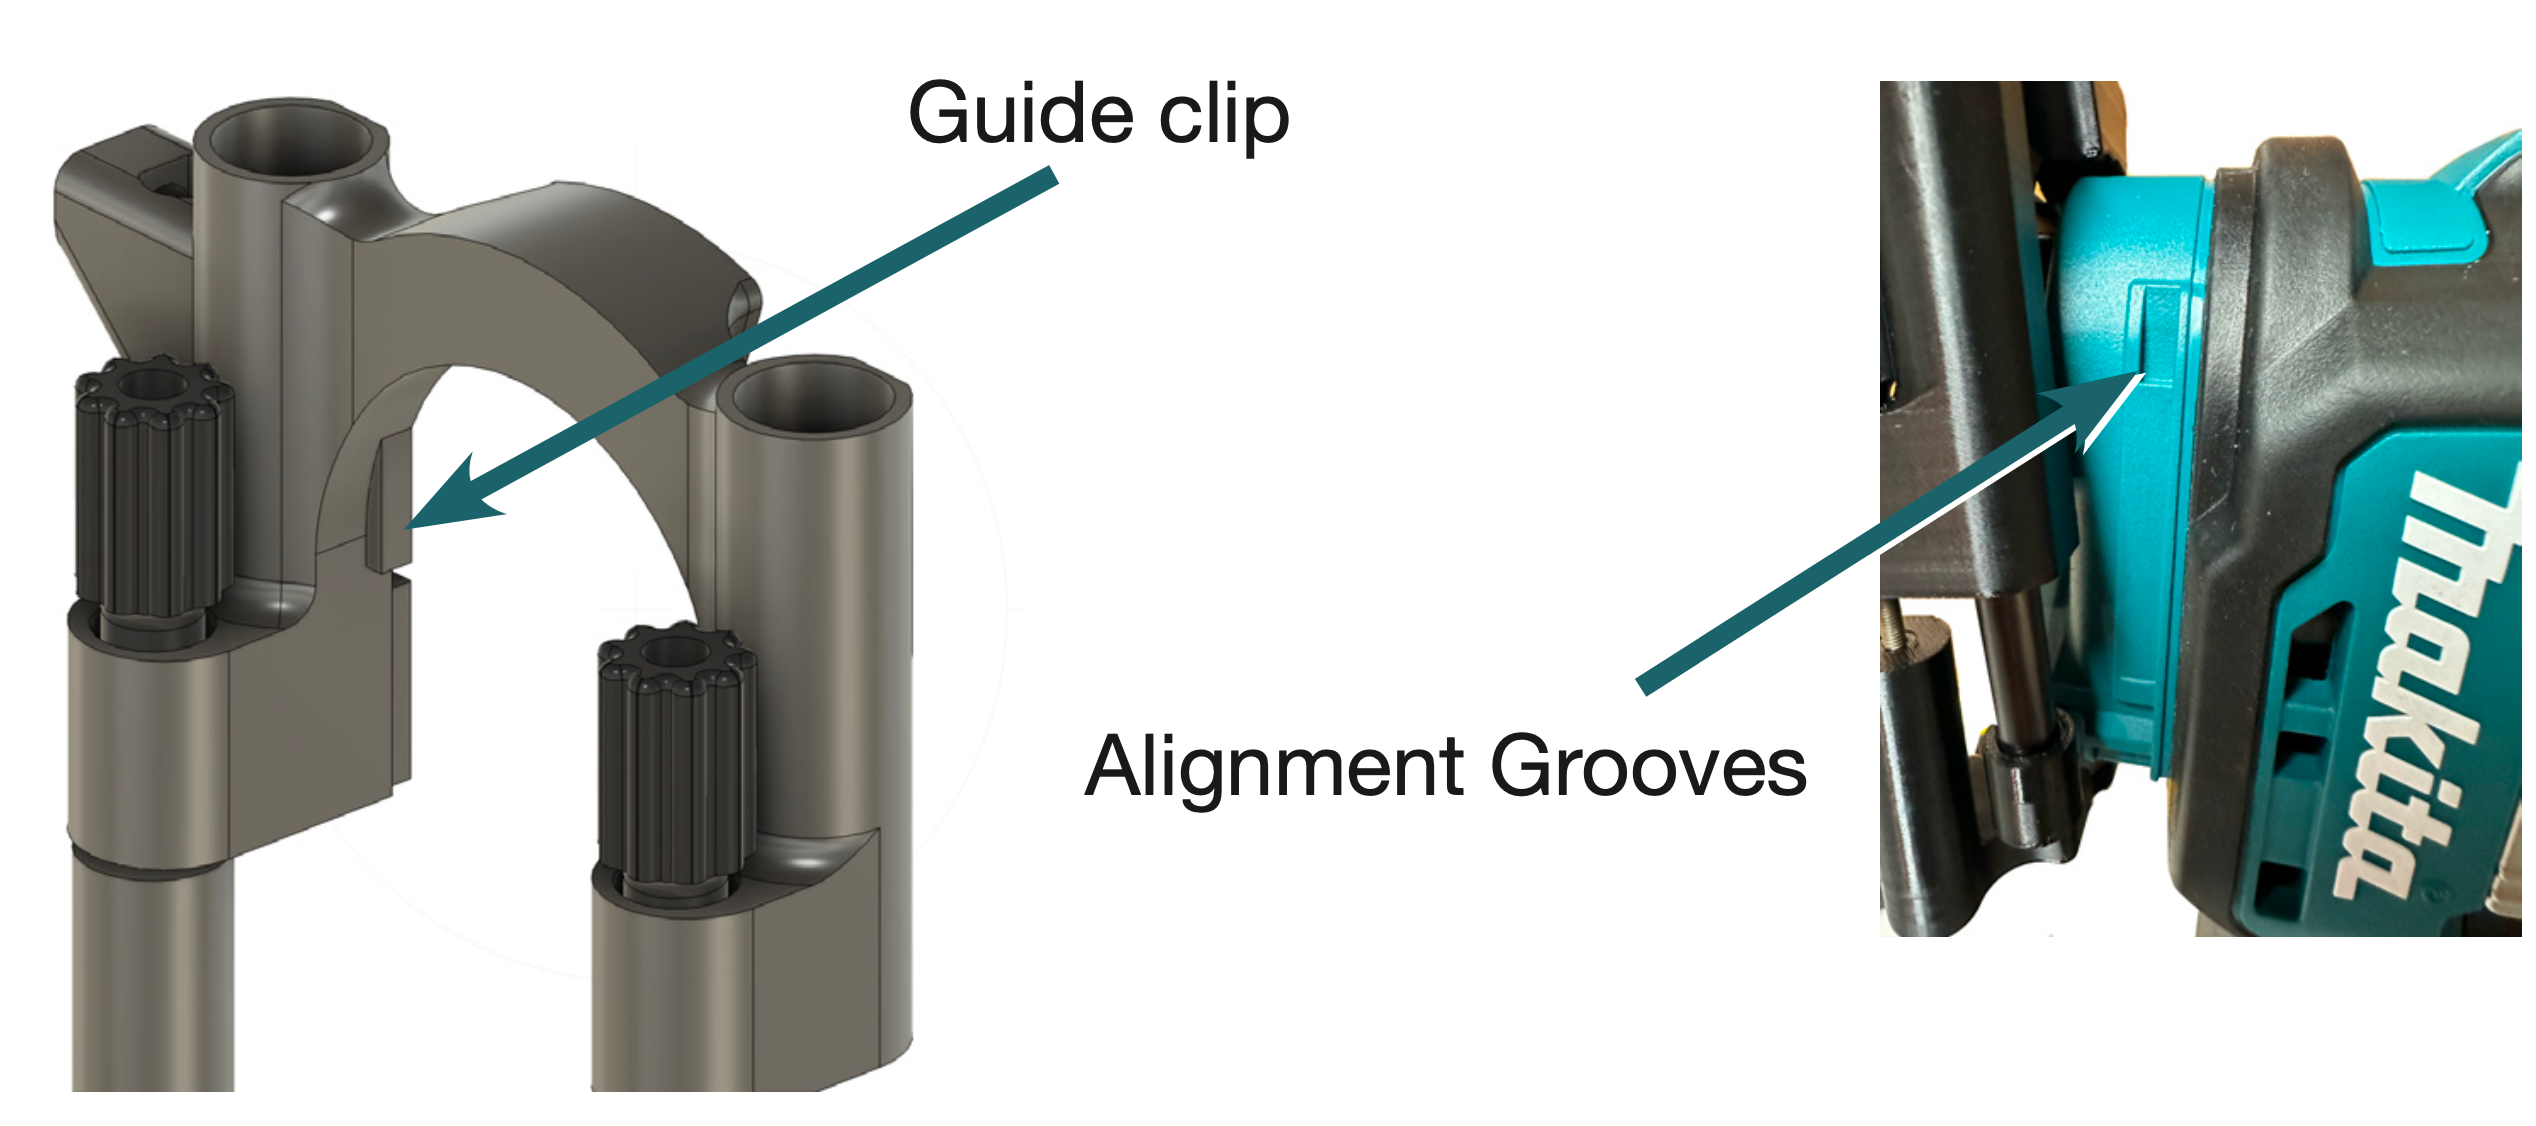
Step 2: Slide the mount onto the tool and ensure that the guide clips slide into the alignment grooves on both sides of the tool. Then tighten knobs until a snug fit is achieved.
Image below for reference
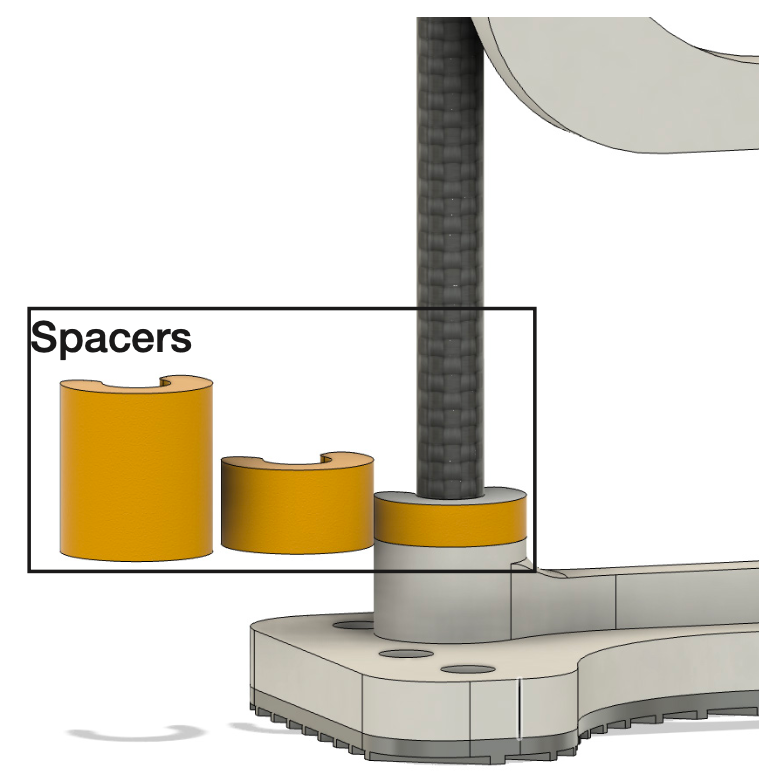
Spacers
There are 3 spacers (5mm 10mm 15mm) included that can be added or removed to offset longer blades.
Bottom platform can be flipped around if desired. Extra mounting points are for attachments like dust collection - coming soon!
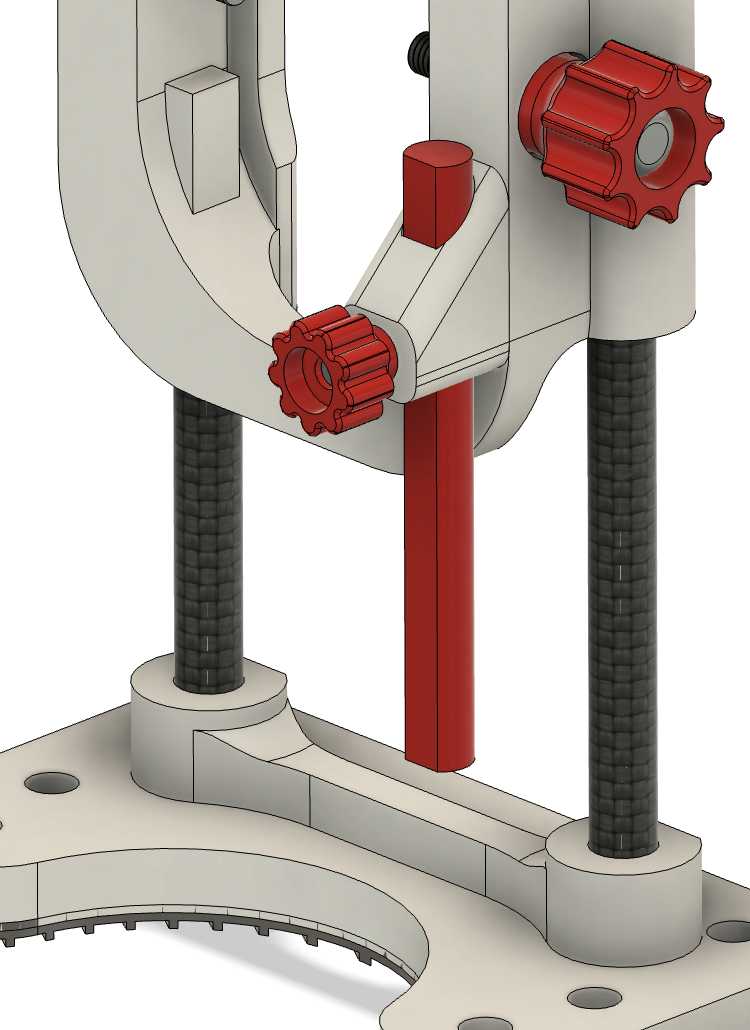
Using the depth stop
Due to the high oscillating vibrations, we have included a wave washer to offset the screw from loosening. Ensure that you tighten the depth stop as much as possible to prevent loosening while using the tool.